Brownies Part 2
Okay, so as it turns out, I did get a frosting request. I hope you don’t mind, but I’m not actually going to make the frosting, because I made brownies yesterday, so yah know, a bit of a waste of materials. Anyway, if you want to know how to do the brownies, go to my post called, wait for it, Brownies, and if you like you can come over here and add a bit of sugar and spice on top.
Ingredients:
Instructions:
Combine butter, cocoa powder, honey, vanilla extract, and confectioners’ sugar.
Stir until smooth.
Spread evenly over the cooled brownies
Okay, there you go! Let me know if you try it out!
-BakerQueen
Brownies…
Vell, I already did a classic (chocolate chips, duh), so ve must do another. My sincerest apologies, but I don’t really do cake (sorry!) cupcakes are fine (preferably no frosting, because usually that messes up), and I LOVE muffins, but when I try cakes, they taste DELICIOUS but don’t usually LOOK that way (and yes, I know that the taste is 2/3 important, but the rest is in the looks!). Wait, that’s a lie. The cake looks fine, but the frosting messes it all up and looks messy. Anyway, I totally got off topic there, sooooo… brownies, brownies, brownies! This recipe I have done once instead of using my normal recipe, and this one was waaaaaay better. There is an option for adding frosting to the brownies, but I wasn’t going to put that on. If anyone wants me to, ask, and I shall add it on, but yeah. Here we go.
Ingredients:
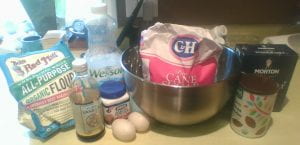
1/2 butter melted (or vegetable oil)
1 cup white sugar
2 eggs
1 tsp vanilla extract
1/3 cup unsweetened cocoa powder
1/2 cup all-purpose flour
1/4 tsp salt
1/4 tsp baking powder
Instructions:
Preheat oven to 350 degrees F. Grease and flour an 8-inch pan.
Pour 1/2 melted butter into a large mixing bowl, and stir in sugar, eggs, and vanilla.
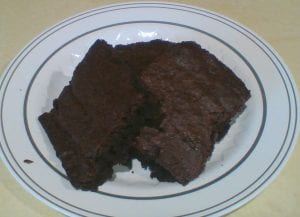
Beat in the cocoa powder, flour, salt, and baking powder. Spread the batter into the prepared pan.
Bake in preheated oven for 25 to 30 minutes. Don’t overcook it!
Oooookay then! Enjoy your brownies! Oh, and about the frosting. I will post the recipe for it if anyone asks. I didn’t really want to do it here because, hello? Frosting on brownies?! But you know, if I must, I shall. If you try the recipe, tell me what you think!
-BakerQueen
Peppermint Bark
Wow is this pathetic! It’s waaaaaay past the holidays. But you know what, I LOVE peppermint bark, and I am going to make it so deal with it people! So, moving on, peppermint bark is not at all hard to make. It is super simple, and in the end, delicious, so here is the recipe I always use.
Ingredients:
1 bag white chocolate chips (preferably Ghirardelli)
1 bag dark chocolate chips (again, Ghirardelli)
3 crushed candy canes
Instructions:
Melt the dark chocolate chips on the stovetop or in a microwavable bowl.
Pour onto a pan covered in parchment paper, spreading evenly and thinly across the bottom.
Melt the white chocolate chips and pour over the dark chocolate, covering as much as possible.
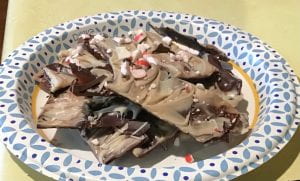
Okay, here is the hard part. Take a toothpick and drag it through the chocolate, making an almost feathery shape. Do this all over, but be careful not to overdo it.
Sprinkle the candy cane over the chocolate, and gently press it into the bark.
Put the bark into the fridge and let it sit for 30 minutes.
After a half hour, take it out and carefully break it into small pieces.
Enjoy!
Cool, so if you try it, let me know what you think! This is one of my favorites!
-BakerQueen
Chocolate Chip Cookies
Hey, all! I figured I trust you enough (yeah right dare to hope) to show you my FAVORITE EVER RECIPE. I love chocolate chip cookies (who doesn’t? And if you say “I don’t”, I MIGHT VIRTUALLY PUNCH YOU!), so I took a recipe that I really like, and improved it (as in, added a secret ingredient). So be prepared for awesomeness!
Ingredients:
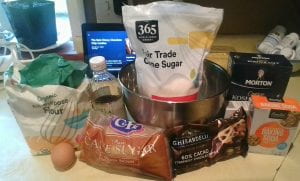
½ cup granulated sugar
¾ cup brown sugar, packed
1 teaspoon salt
½ cup unsalted butter, melted
1 egg
1 teaspoon vanilla extract
1 ¼ cups all-purpose flour
½ teaspoon baking soda
1/3 cup dark chocolate chips
½ cup dark chocolate chips*
1 tablespoon milk
*Don’t mix up the 1/3 and ½ cups, they have special purposes.
Instructions:
In a large bowl, whisk together the sugars, salt, and butter until a paste forms with no lumps.
Whisk in the egg and vanilla, beating until light ribbons fall off the whisk and remain for a short while before falling back into the mixture.
Sift in the flour and baking soda, then fold the mixture with a spatula (Be careful not to overmix, which would cause the gluten in the flour to toughen resulting in cakier cookies).
Fold in the ½ cup chocolate chips, then chill the dough for at least 30 minutes. For a more intense toffee-like flavor and deeper color, chill the dough overnight. The longer the dough rests, the more complex its flavor will be.
Melt the 1/3 cup of chocolate chips on the stovetop or in a microwaveable bowl, being careful not to let it burn. After the dough is finished resting, pour in the melted chocolate and mix it in. Add the milk.
Preheat oven to 350°F (I usually do this about halfway through the 30 minute chilling time, but it’s up to you). Line a baking sheet with parchment paper.
Scoop the dough with an ice-cream scoop onto a parchment paper-lined baking sheet, leaving at least 4 inches (10 cm) of space between cookies and 2 inches (5 cm) of space from the edges of the pan so that the cookies can spread evenly.
Bake for 12-15 minutes, or until the edges have started to barely brown.
Tips:
You don’t have to let it sit for a half hour, but it will be lighter in color and more soft and chewy if you don’t, I prefer the chilling option though.
For the chocolate chips, I usually use the Ghirardelli brand, which you can find at most stores, but if you have a preference, that’s fine, I promise not to judge.
If you want extra flavor, you can sprinkle salt on top of the cookies before you put them in the oven, it just brings out the sweetness a bit more.
If you want to make the cookies look neater, you can gently push down on the top with a spatula or your hand, so they are less tall.
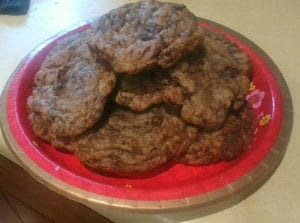
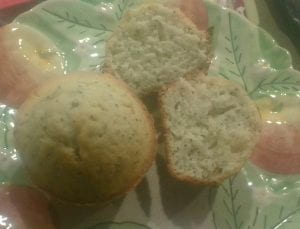
Okay, so I just wanted to let you know that I am totally aware that sometimes the pics of the food doesn’t look so good (the muffins, the muffins!) but I have never been good at getting things fancy, plus I have bad lighting, but I PROMISE it tastes good, so if you decide to try it out, let me know how it works!
-BakerQueen
Almond Poppy Seed Muffins
Okay, so today is my friend’s birthday, she is turning 2, and I thought it would be fun to try and make her almond poppy seed muffins! I’ve never made them before, but I have had the most delicious one ever, and I thought I should try to recreate it for you guys!
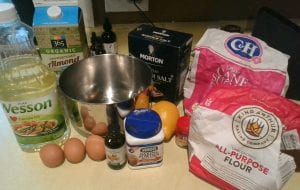
Ingredients:
2 tablespoons poppy seeds
1 1/2 teaspoons baking powder
1 1/2 teaspoons salt
3 cups all-purpose flour
2 1/2 cups sugar
3 eggs
1 1/2 cups milk (almond milk if vegan)
1 cup canola oil
1 1/2 teaspoons vanilla extract
1 1/2 teaspoons almond extract
Instructions:
In a large bowl, combine the flour, sugar, poppy seeds, baking powder and salt. In another bowl, whisk the eggs, milk, oil and extracts; stir into dry ingredients just until moistened.
Fill greased or paper-lined muffin cups two-thirds full. Bake at 350° for 20-25 minutes or until muffins test done. Cool in pan 10 minutes before removing to a wire rack. Serve warm.
Okay, so there you go! I know almond poppy seed is a little different than the usual lemon, but they are still super awesome! Enjoy!
-BakerQueen
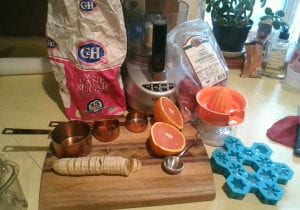
Strawberry Banana Smoothie
Okay, so I said that maybe I’ll do this one, but then I was like, what the heck it’s awesome do it anyway. So, in my most respected and honored opinion, here is a delicious recipe for a (healthier) strawberry banana smoothie. Oh and as an after thought, I guess making smoothies isn’t really baking, but it is still a dessert, so for this once, it doesn’t count.
Ingredients
1/3 cup lemon juice (or orange juice if necessary)
1 cup water
1 cup frozen strawberries
1 banana sliced
2 Tbsp agave (healthy) or sugar (less healthy)
1 tray of ice cubes
Baking tools
1/3 cup
1 cup
Tablespoon
Ice cube tray
Instructions
Place all of the ingredients into the blender and blend. Serve in a tall glass with a straw.
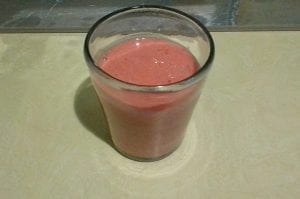
Okay, so that is a recipe I love to make, because it is delicious, and in the summertime it is a perfect snack. There is a non-banana version in which you just don’t use the banana and everything else is exactly the same. I personally love to experiment with the recipe and add new stuff, but you can do whatever you would like. Enjoy a cold sweet treat!!!
-BakerQueen
What is this blog about???
Hey people! I just wanted to give you a little intro to what this blog is about! I figure the title may be a BIG hint to what’s going on here, but a little detail never hurt anyone. So, I am going to do a little baking every once and a while, and you all get to learn a bit about it. I’ll do some of my favorite recipes (these are all gonna be dessert okay? PRIORITIES PEOPLE) and share them with you. A couple of things I (might!) try are peppermint bark (I know it’s simple, but it is still awesome), chocolate chip cookies (classic!), and (maybe maybe maybe) strawberry banana smoothie. I’m going to put in vegan and non-vegan versions for people, and a couple ways to make the desserts healthier (I know its boring, but some people are thankful for it). Thanks for checking this out!
-BakerQueen